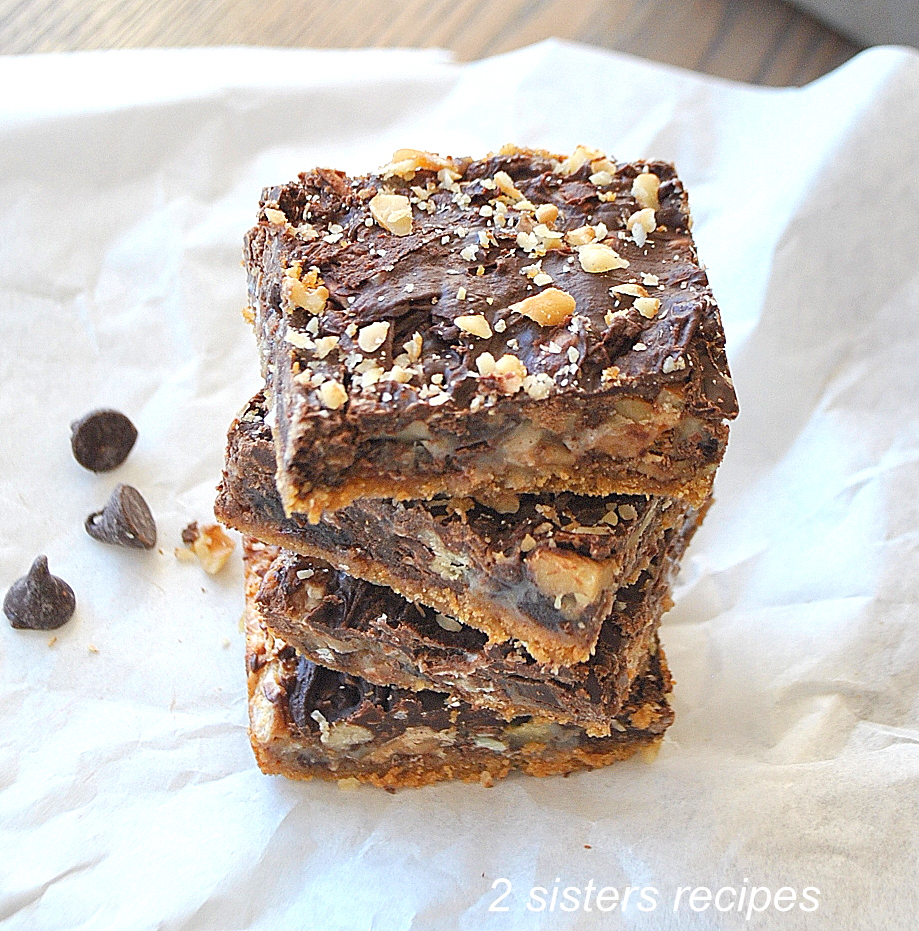
Dark Chocolate Magic Cookie Bars

Dark Chocolate Magic Cookie Bars are chewy, gooey delicious and make the perfect little dessert when you need one in a hurry. These bars are made with some of our favorite chocolate candies, making them very easy to whip up and serve.
The Ideal Magic Bars If You Love Chocolate
Growing up, we always remembered making these delicious treats called “magic bars.” So we decided to make a few subtle changes to them. And, they’re perfect to make all year long and special occasions.
Plus, making them with dark chocolate, is even better. Any dark chocolate treat happens to be our favorite “go-to” when we need to satisfy our sweet tooth. And boy do we LOVE these magic bars!
Great to whip up in a hurry. You can refrigerate and even freeze them! Dark Chocolate Magic Cookie Bars have a chewy filling, loaded with flavors along with a subtle peppermint undertone in every bite. So good!
Tell Us About Dark Chocolate Magic Cookie Bars:
- There’s no mixing, just layering the ingredients and bake.
- These little bars have a soft-cookie bottom and a chewy, nutty crunchy texture, along with a mild peppermint undertone.
- Loaded with dark chocolate, shredded coconut, walnuts, raisins, bits of toffee, and bits of Andres Crème de Menthe chocolate make these bars irresistible!
- Individual bars make easy servings and a perfect size dessert. No need to serve with a fork, spoon, or plate – just a napkin will do!
- A great make-in-advance treat and they stay fresh for days.
Ingredients You Will Need for Dark Chocolate Magic Cookie Bars:
Here are the ingredients you will need, along with affiliate links from Amazon for your shopping needs. Plus, our full recipe card is located at the bottom.
- graham cracker crumbs – or you may use gluten-free cracker crumbs.
- sweet butter
- sweetened condensed milk
- Andes Crème de Menthe baking chips
- Hersey’s dark chocolate bar, or any dark chocolate of your choice
- Toffee chocolate bar
- raisins
- shredded unsweetened organic coconut
- walnuts – (if you are allergic to nuts, omit them)
- bittersweet or semisweet chocolate chips
How To Make Dark Chocolate Magic Cookie Bars
Want to learn how to make these magic cookie bars? It very simple! It is all about layering each ingredient.
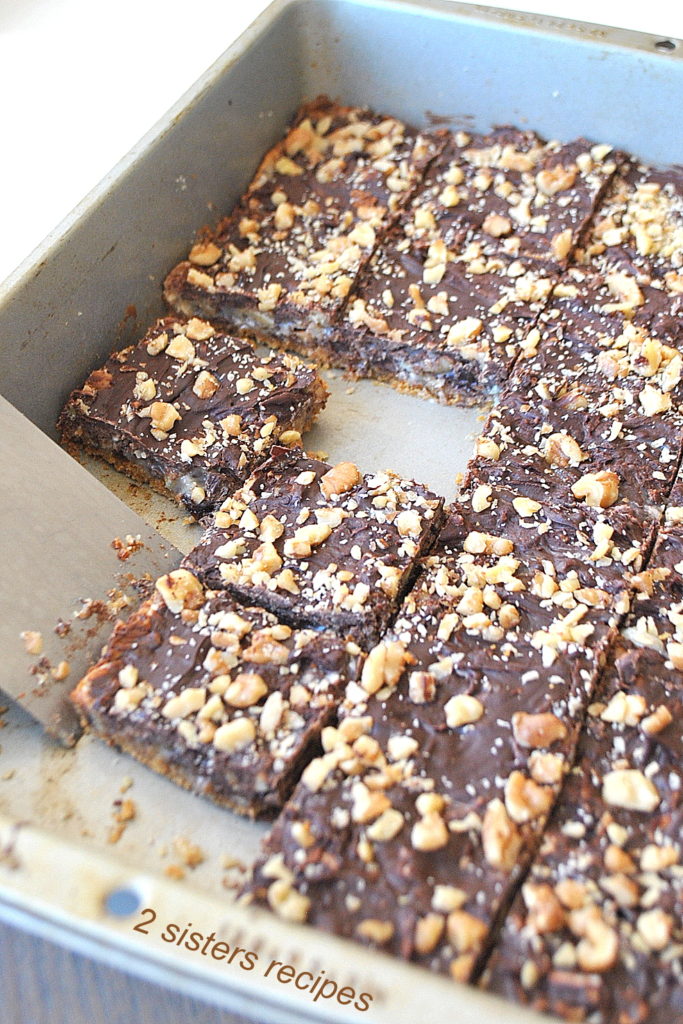
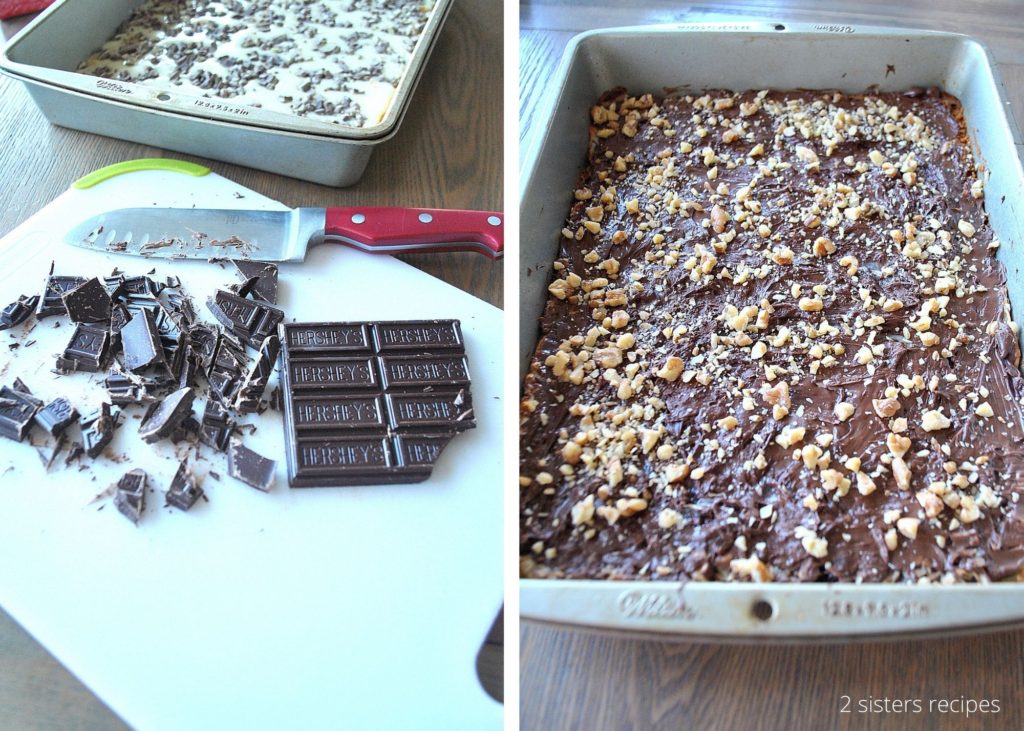
1. First, melted butter is poured on the bottom of the 9 x 12-inch baking pan. Second, a layer of crumbs over the butter.
2. Next, spread a layer of condensed milk, and then top with a layer of walnuts, raisins, and Andes Crème de Menthe chips. Then scatter a layer of chopped pieces of toffee, chopped Hershey’s dark chocolate, and shredded coconut on top. All these layers and textures give these bars their irresistible taste and crunch.

3. Bake for 15 to 18 minutes. Remove from oven.
4. The Last Step, we scattered an additional layer of bittersweet chocolate or chocolate chips on top, and quickly transferred the pan back into the oven for 1 minute, to slightly melt the chocolate. Remove from oven, then use the back of a spoon, spread the melted chocolate over the entire surface, and scattered chopped walnuts on top.
5. Chill for an hour or more.
Recipe Tips
Layer the ingredients makes these bars this super easy. We guess it’s what makes them called magic bars in the first place.
Add the Final Layer: Be sure to add the final layer of chocolate chips and then transfer the pan back into the oven for about 1 to 2 minutes, until the chips turn shiny. Spread them into one single layer to cover the surface, and scatter with chopped walnuts before it cools.
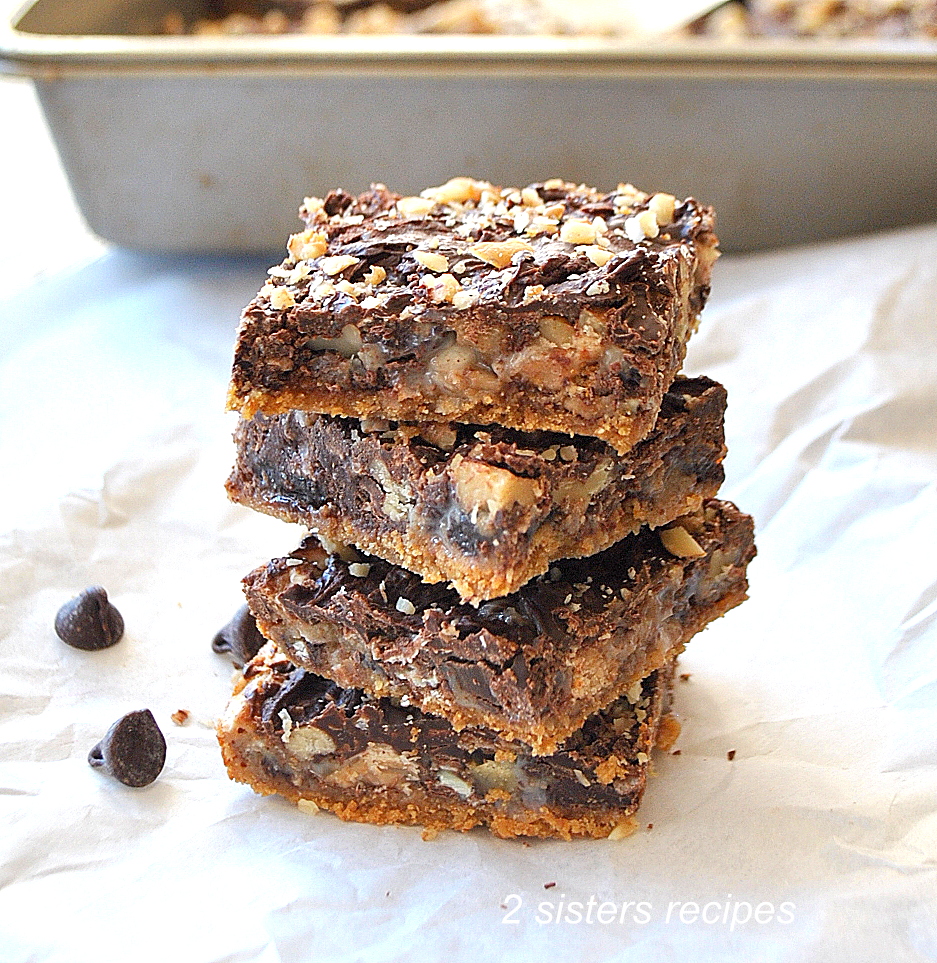
Allow cooling before you cut into bars. You will need to allow the pan to cool completely before cutting into bars, or they will crumble and fall apart.
Freeze the pan is quicker to cool the mixture before cutting into bars.
Store in at room temperature, or we prefer to keep them chilled in the refrigerator. They will stay fresh longer. Also, they will freeze well too.
A Delicious Chocolate Treat
These dark chocolate magic bars are fun, and easy to make. They are always a huge hit every time we serve them. A delicious treat! Everyone will RAVE after one bite.
Try them, you’ll love them as much as we do.
ENJOY!
More Dark Chocolate Treats
- S’mores Dark Chocolate Bark
- Chocolate-Dipped Apricots
- Quick & Easy Toffee Bars (gluten-free & nut-free)
- Dairy-Free Chocolate Pudding
- Mini Brownie Cups Filled with Nutella
- Death by Chocolate Zucchini Muffins
Tried our Dark Chocolate Magic Cookie Bars? If you do, please let us know and leave a comment with a star rating. We’d greatly appreciate it. Have fun and snap a photo and share it on Pinterest, and be sure to tag or hashtag us. We’d love to share them with the world.

Dark Chocolate Magic Cookie Bars
Dark Chocolate Magic Cookie Bars are chewy, gooey delicious and make the perfect little dessert when you need one in a hurry. These bars are made with some of our favorite chocolate candies, making them very easy to whip up and serve.
Ingredients
- 1 + 1/4 cups Graham cracker crumbs (or gluten-free)
- 8 Tbsp. ( 1 stick) of sweet butter
- 1 (14-ounces) sweetened condensed milk
- 1/2 cup of Andes Crème de Menthe chocolates baking chips
- 1 large (4.25 ounces (120 grams) Hersey's milk or a dark chocolate bar - chopped
- 1/3 cup (1.4 ounces (39.5 grams) of Toffee chocolate bar - chopped
- 1 cup raisins
- 1 cup shredded unsweetened organic coconut
- 1/2 cup walnuts - chopped
For The Final and Top Layer:
- 1 + 1/2 cups bittersweet or semisweet (mini or regular) chocolate chips
- 1/3 cup chopped walnuts
Equipment Needed:
- 12 x 9 Baking Pan
Instructions
- Preheat the oven to 350 degrees (180C).
- Melt butter and pour into a 12" x 9" Baking pan. Next, scatter the graham crumbs over the melted butter evenly.
- Pour condensed milk over the crumbs. Scatter on top with Andes crème chocolates, then with dark chocolate bar pieces, followed by toffee pieces, raisins, shredded coconut, and 1/2 cup of walnuts.
- Bake on the center rack of the oven for 15 to 20 minutes, and the edges are golden.
- Remove the pan from oven. And, scatter with 1 + 1/2 cups of dark chocolate chips on top. Return pan to the oven and bake for an additional 1 to 2 minutes, or until the chips turn shiny.
- Turn off the oven. Remove the pan from the oven again. Using the back of a spoon or a butter knife, spread the melted chocolate over the entire surface. Then sprinkle on top with the remaining chopped walnuts.
- Leave the pan on your counter to cool completely before cutting for a few hours. NOTE: To speed up the cooling process, place the pan into your refrigerator for 2 hours or more, or into the freezer for 1 hour.
- Using a very sharp blade to cut the chocolate into (2 x 2-inch) square bars. Best kept chilled. Store them in an air-tight container, refrigerate, or freeze for up to 2 weeks.
- Yields: 24 to 28 bars
Nutrition Information:
Yield: 28 servings Serving Size: 1 serving (1 bar)Amount Per Serving: Calories: 315Total Fat: 18gCarbohydrates: 32gFiber: 1gSugar: 25gProtein: 3g
This recipe is original and posted back in 2011, only content and photos have been updated.
Happy Baking! 🙂
Thanks for stopping by!
xo Anna and Liz
Related Posts:
")


Welcome! From Anna and Liz
We believe the kitchen is the center and the heart of the home. It is where we cook, eat, and unwind with family and friends, creating memorable traditions! Read more…
FREE EMAIL BONUS
Weeknight Dinners Made Easy
Tips & recipes for delicious meals . . . no matter your skill level!
FREE EMAIL BONUS
Weeknight Dinners Made Easy
Tips & recipes for delicious meals . . . no matter your skill level!
My MIL used to make these and she called them ‘Hello Dolly Bars’. So delicious! I love your extra layer of chocolate on top, what a great idea.
Thanks, Susan. These are so addicting because of all the candies and layers – they’re truly amazing! And the fact that it takes less than 10 minutes to put it all together, is even better! Have a great weekend, my friend! 🙂
My husband would go nuts for these! He’s the chocolate peppermint guy in the family. Printing the recipe!
Thanks so much Mimi! Have to tell you, they are addicting – to say the least! Enjoy!
Look delicious and so very nice that they are quick.
Thank you for leaving a lovely comment! We're glad you like the recipe!
Another fun version of magic cookie bars. Perfect for the season!
Thanks Abbe, we make so many variations of these bars, so much fun!
This sounds like the most fantastic flavor combination ever!
Thanks! These bars are so addicting! You have to try them!
Just perusing the list of ingredients makes me hungry. These look really good and no wonder you have to hide them!
HI Maureen and welcome to 2sistersrecipes! Its so nice to meet you, and thank you for leaving a lovely comment.
I'm an andes candies addict…..These are great!!
I would not be safe with these around! LOVE milk chocolate and what a wonderful use of it!Mary x
These are loaded with great ingredients! I remember eating something similar as a little girl.
That looks like a dessert my aunt used to make and I can never find the recipe for. I loved it too- this looks like it might be it.I can't wait to try it and surprise my mom with it over christmas