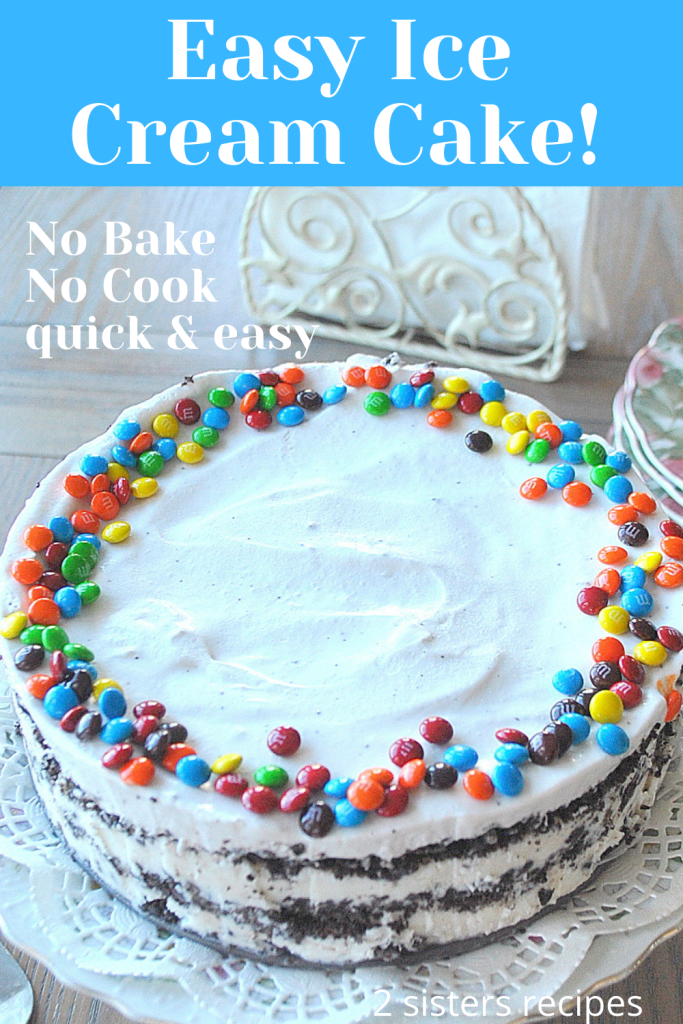
Easy Ice Cream Cake (No-Bake!)
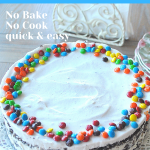

How to Make an Easy Ice Cream Cake? This irresistible no-bake ice cream cake is layered with creamy vanilla and refreshing mint chocolate chip ice cream, packed with rich chocolate crunchies, and finished with a fluffy whipped cream topping. It’s a simple, crowd-pleasing frozen dessert that looks impressive but couldn’t be easier to make. Follow our step-by-step instructions to create this delicious treat – it just might become your new favorite!
Highlights to our (no-bake) Easy Ice Cream Cake…
When you can easily make this frozen dessert, why bother buying it at ridiculous prices?
- This recipe is not complicated to make and is budget-friendly.
- Easy to assemble the layers and freeze!
- Perfect for all festive occasions, birthdays, anniversaries and more.
- Make it with your favorite ice cream flavors! Besides, if you buy them on sale, it is an even better and huge saving.
- Make It Ahead! You can make this frozen dessert up to two weeks ahead, and keep it in your freezer until you are ready to serve.
- Best part? No Baking and no cooking… (No Stress!) 😉
With our Step-by-Step Directions, you too can make your favorite ice cream cake in less than 30 minutes and for a fraction of the cost!
How to Make This Easy Ice Cream Cake?
For our ice cream cake, there are 3 Easy-To-Follow steps! Let’s discuss the steps before assembling this ice cream cake.
STEP 1: Make the Oreo Crunchies: Everyone and every kid still today loves the dark chocolate crunchies inside a Carvel cake. So you too can make the same crunchies for any ice cream cake you wish to make. And, scatter them in 3 layers – bottom, center, and on top.
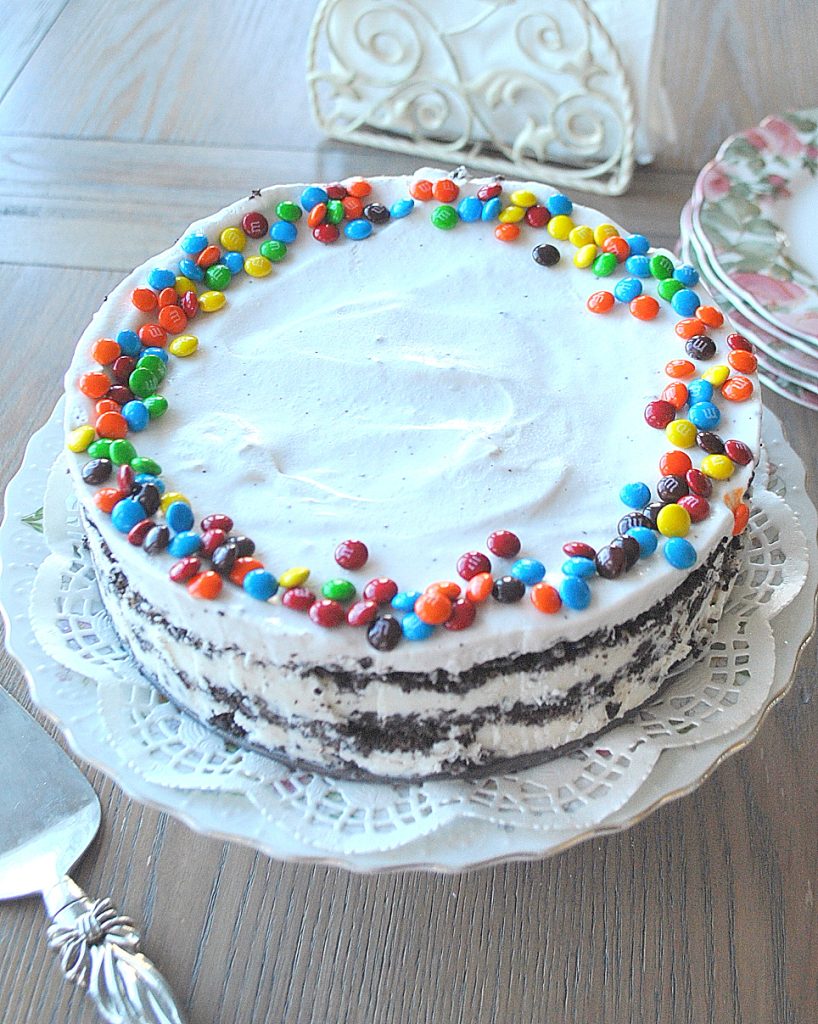
STEP 2: Layer with Your Favorite Flavors of Ice Cream: I made this one for a family friend and used two of their favorite flavors of ice cream, one layer with vanilla bean and the other layer with mint chocolate chip. But you can use any flavors of your choice.
STEP 3: Topped with Whipped Cream & Freeze: Just like Carvel cakes and other store-bought ice cream cakes, whipped cream on top is a must! Then, of course, decorations on top don’t hurt either. They make for a festive cake to celebrate any occasion.
OK, Now we can begin…
Here’s what you will need to make an Easy Ice Cream Cake: (including links to Amazon)
- one 8-inch springform cheesecake pan.
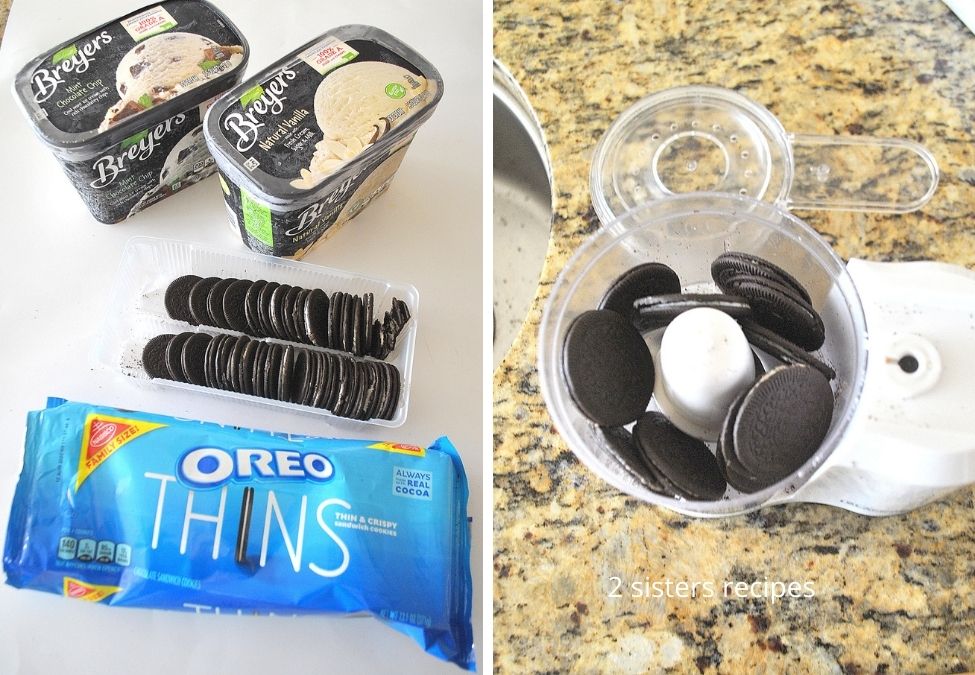
- one, two or 3 flavors of your favorite ice cream.
- one package of Oreo Thins (thin cookies) – to make the crunchies.
- one container of whipped topping or CocoWhip DF topping.
- your favorite candies, sprinkles, or M&M minis for the top.
- parchment paper – to place on the bottom of the pan.
- foil wrap – wrap the bottom and top of the pan before freezing.
Directions to make Easy Ice Cream Cake…(with STEP-BY-STEP instructions!)
First, PREPARE THE CAKE PAN:
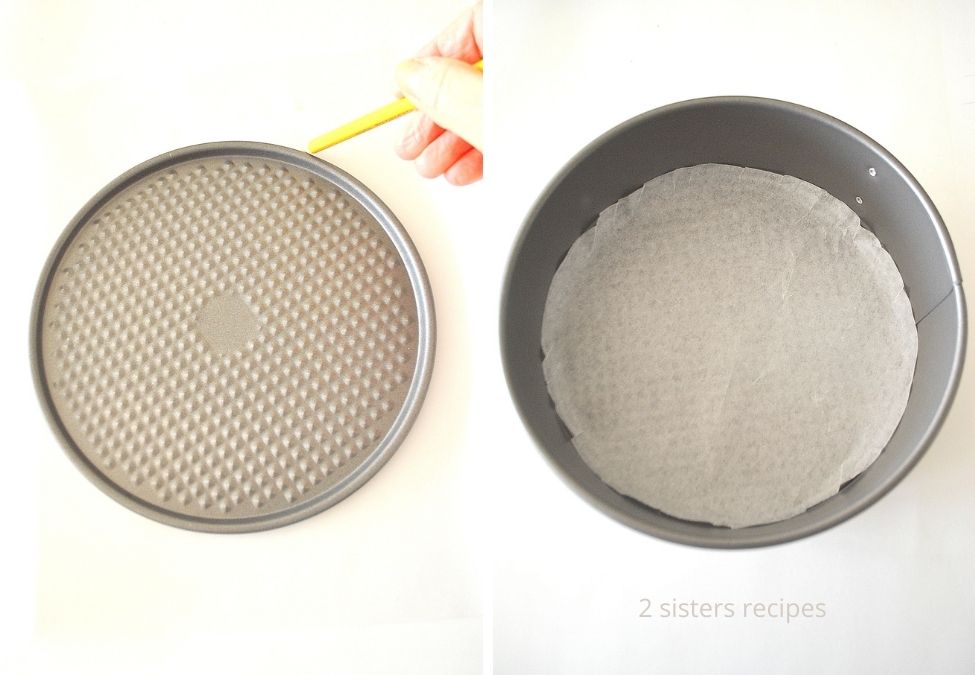
- Remove the bottom from your 8-inch springform pan and use a pencil to trace it onto parchment paper, then cut the circle and place it inside your springform pan.
2. Next, place the “cake pan” into the freezer for a few minutes to chill.
Second, MAKE THE CHOCOLATE CRUNCHIES:
Meanwhile, take out the tubs of ice cream from your freezer and place them on the counter nearby (to thaw a little).
Next, make the chocolate crunchies! Use your mini chopper or food processor to crush the oreo thins cookies, and pulse a few times to finely crush them. Set them aside.
Now You’re Ready to Put It All Together… with our Easy-to-Follow Steps:
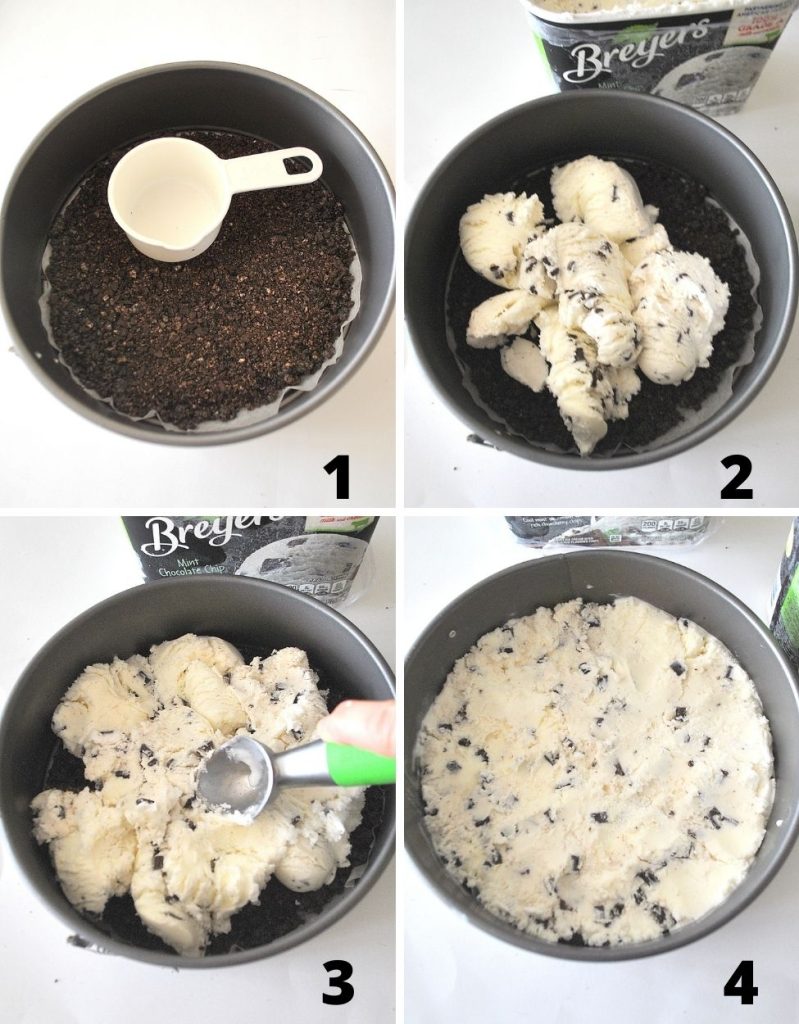
1. LAYER THE CRUST: Remove the cake pan from your freezer. Measure about 1 cup of chocolate crunchies and mix them with the melted butter and some sugar. Scatter them on the bottom of the pan. Use a measuring cup and press firmly on the bottom. Transfer the cake pan back into the freezer for a few minutes to set the crust.
2. ADD THE FIRST LAYER of ICE CREAM: Start with your “first flavor” of ice cream. When the ice cream has softened enough to scoop easily, remove the cake pan from your freezer and start with a couple of scoops of ice cream, about 5 to 6, and drop them onto the crust.
3. USE THE BACK OF THE SPOON or the ice cream scoop and gently press the ice cream down. If you feel you need additional ice cream to complete the first layer, go ahead and add more.
4. SPREAD IT EVENLY: Spread the ice cream evenly into one thick layer, and about 1/3 full of the cake pan.
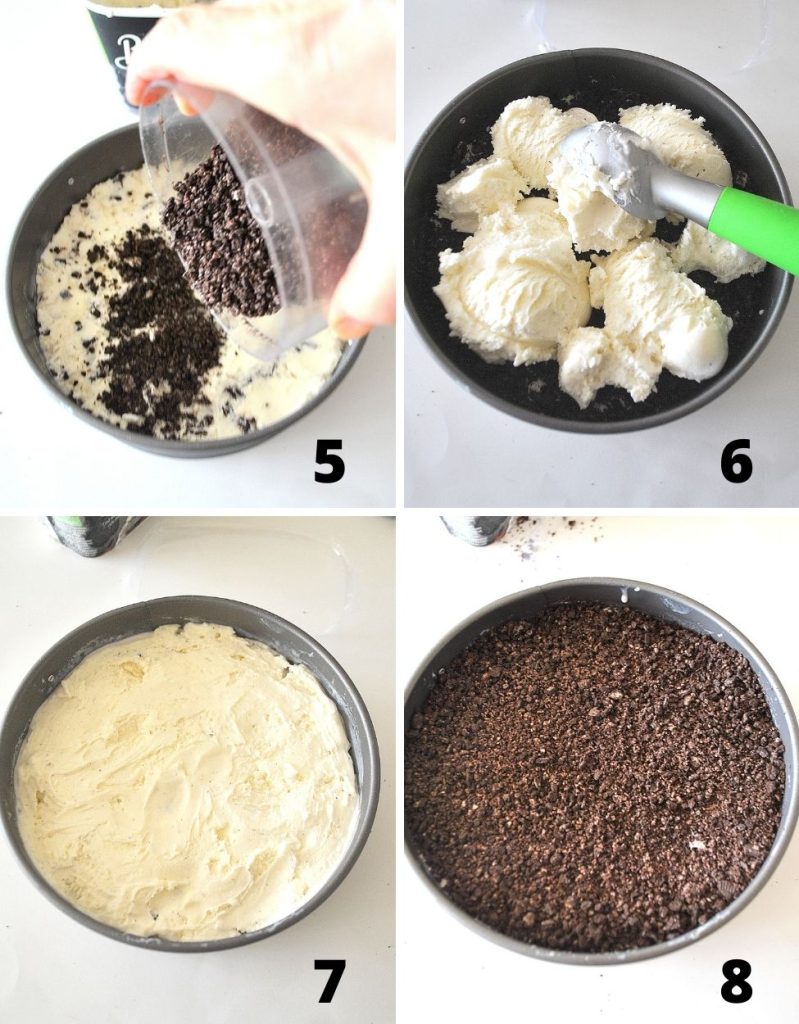
5. ADD the SECOND LAYER of CRUNCHIES: Scatter with another layer of dark chocolate crunchies over the ice cream.
6. MAKE THE SECOND LAYER OF ICE CREAM: Scoop the “second flavor” (of your choice) of ice cream and place them over the crunchies.
7. SPREAD THE ICE CREAM: Use the back of a spoon or ice cream scoop to flatten it all into an even layer.
8. TOP WITH THE FINAL LAYER: with chocolate crunchies. Then place the cake back into the freezer for a few minutes.
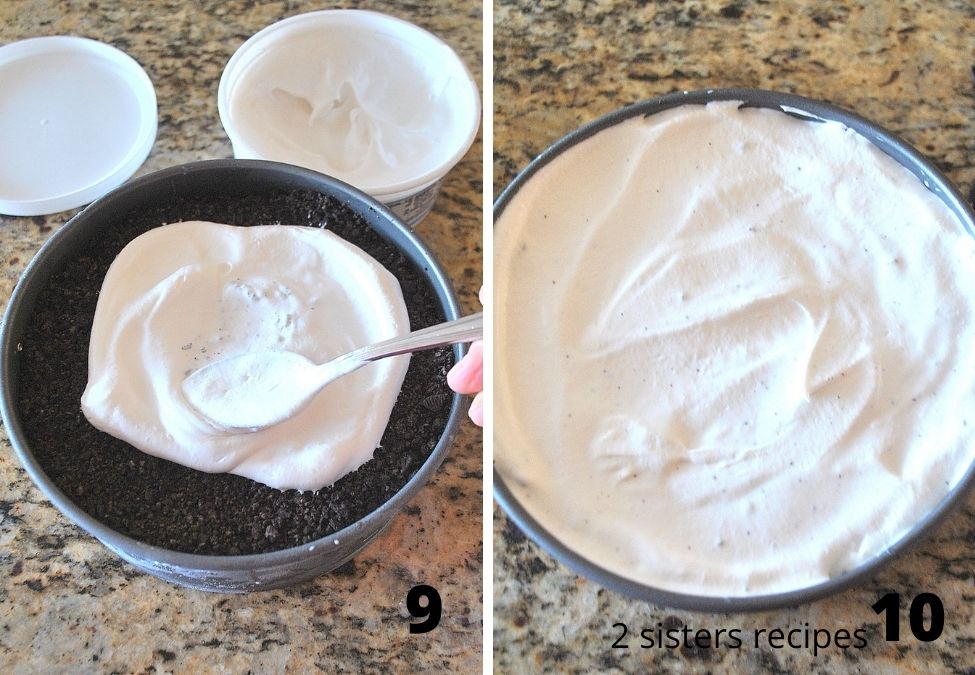
9. & 10. FINAL LAYER ON TOP: When the whipped topping is completely thawed, remove the cake pan from the freezer and begin to spoon some of the whipped cream on top as the final layer.
Add enough to complete the cake and spread it evenly to cover the entire cake. If you prefer, you can decorate the top and then freeze it. Cover the top with a sheet of foil wrap, then freeze.
*QUICK NOTE: I prefer to freeze before adding the candies on top. This will help prevent the M&M minis from melting into the cream.
Some Tips for Success…
- I used a frozen dairy-free coconut whipped topping for the top of our ice cream cake. But you can use any whipped topping you prefer. When you bring it home, keep it in your refrigerator to thaw so it’s ready when you need it.
- It’s best to chill your springform pan in your freezer or fridge for a few minutes before you start. This will help prevent the ice cream from melting too quickly while you’re putting it together.
- Also, it is a good idea to wrap the bottom of the pan with a sheet of foil to keep from any ice cream coming through while you are putting it together.
- Keep in mind, that you will not be using the entire container of ice cream unless you use a larger springform pan.
- Plus, if you plan to use a larger springform pan, you will need to increase the amount of ice cream and crunchies needed.
When Ready To Serve…
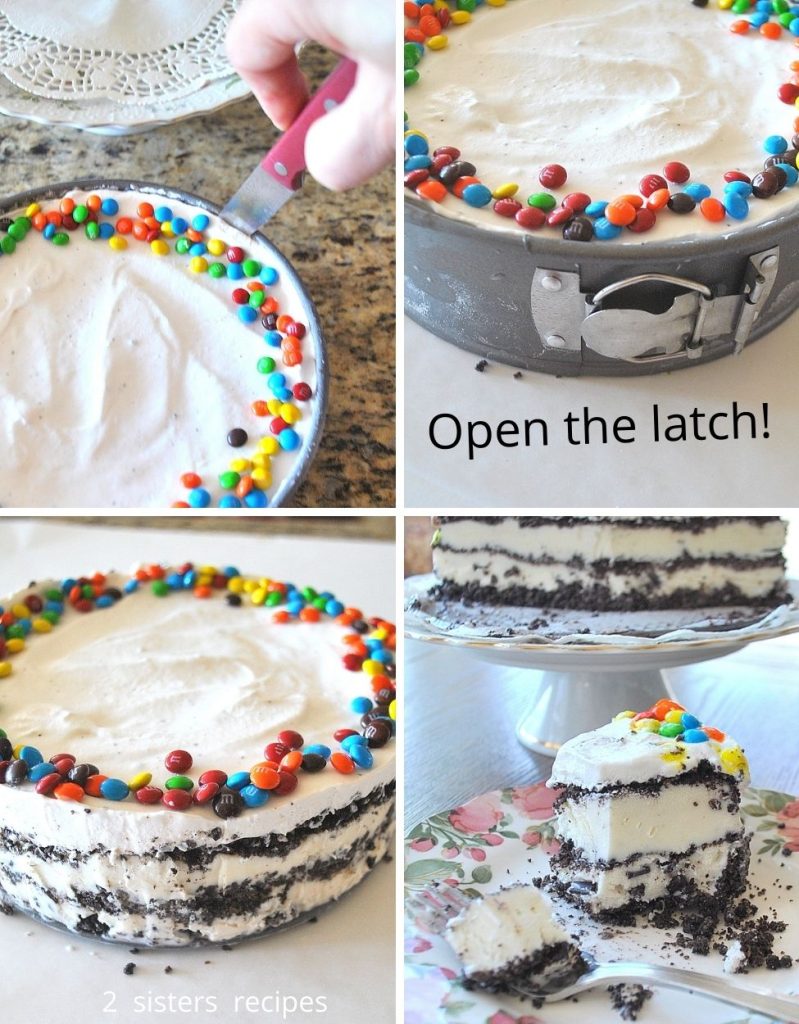
- First, take a knife and run it under warm water for a few seconds. Then slide the knife around the perimeter of the pan. You will need to run the knife under warm water a few times before you make it all around.
2. Next, open the latch (the clip on the side) and remove the rim.
3. Transfer the cake onto a cake plate. Wait about 5 minutes for the cake to soften, then slice with a clean knife into pieces and serve.
Get Creative! Decorate with Your Favorite Toppings:
- Top with rainbow sprinkles
- chocolate sprinkles
- additional oreo crunchies
- crushed up Heath Bar
- M&M’s mini candy and more!
Storing and Freezing:
- TO STORE: It is best to cover the bottom and top of the springform pan with foil wrap and double-wrap the top with the second sheet of foil. Wrap tightly. This helps prevent freezer burn.
- TO FREEZE: Ice cream cakes will freeze well, and for up to one month.
Have fun with it, your family and friends will appreciate the love you put into it. 🙂
Every time we serve an ice cream cake, we only get “oohs, and ahhs!” … and that’s music to our ears!
I first learned how to make ice cream cakes when I worked at my very first job, at 16, at Carvel. And I have been making them ever since!
ENJOY!!
Additional Easy and Fun Desserts!
- Easy Spumoni Ice Cream
- Banana Chocolate Chip Ice Cream – Only 5 Ingredients!
- Silky Chocolate Cream Pie (No-Bake & Dairy-Free)
- No-Bake Banana Pudding Icebox Bars
- Mixed Berry Icebox Cake (No-Bake)
- Dark Chocolate & Strawberry Ice Cream Roll

Easy Ice Cream Cake
How to Make an Easy Ice Cream Cake? This delicious frozen dessert features layers of vanilla and mint chocolate chip ice cream with chocolate crunchies inside and topped with whipped cream. Simple, easy and a delightful treat for all occasions.
Ingredients
- 2 Tbsp. butter - melted
- 1 Tbsp. sugar
- 1.5-quart Vanilla ice cream
- 1.5-quart Mint Chocolate Chip ice cream
- 1 package (13- ounces) ( 371 grams) Oreo Thins ( thin sandwich cookies)
- 9-ounces (255 grams) frozen Whipped topping ( I used Coco Whip) - thawed
- 8-inch springform cheesecake pan
- wax or parchment paper
Instructions
PREPARE THE SPRINGFORM CAKE PAN:
1. First, remove the bottom dish from the springform pan. Take a sheet of wax or parchment paper and take a pencil to outline the bottom dish. Use scissors to cut the circle. Place the cut paper on the bottom of the springform pan. Place the pan into your freezer to get it cold.
MAKE THE CRUNCHIES:
2. Meanwhile, take 12 to 14 oreo thins and place them into your food processor, and pulse and few times to finely crush them, transfer to a nearby bowl. NOTE: Do this in a few batches, but leave at least 10 cookies in the package, either to decorate with on top or to have extra for later. Measure at least one cup of the crunchies and reserve the remaining crunchies for the center and the top.
3. Place 1 cup of chocolate crunchies into a small bowl, and add the melted butter and sugar. Stir with a fork until well combined.
4. Remove the pan from the freezer. Transfer the crushed cookie mixture to the pan and press firmly on the bottom. Pop the pan back into your freezer for at least 5 minutes to chill.
5. Next, remove the ice cream containers from your freezer and allow them to sit on your counter for a few minutes to soften.
WHEN READY TO ASSEMBLE THE CAKE:
1. When the ice cream is soft enough to scoop, remove the cake pan from the freezer and begin with the first flavor of ice cream. Start with a few scoops of ice cream to cover the bottom layer of chocolate crunchies. Use the back of the scooper or spoon to level the ice cream into a single layer. NOTE: you will use only about half of the container of ice cream.
2. Scatter on top the ice cream with an additional cup of oreo crunchies.
3. Next, scoop with your second flavor of ice cream. Use the back of the spoon to smooth into a single layer.
4. Top with the final layer of chocolate crunchies. Cover with a sheet of foil wrap and freeze for at least 30 minutes.
5. Meanwhile, remove the whipped topping from your freezer and allow it to thaw. When the whipped topping becomes spreadable, remove the cake from the freezer, and spread a layer of whipped cream on top. Cover again with foil wrap and chill it again for at least 30 minutes or more.
6. Decorate the top to your desire, sprinkle some oreo crunchies or with mini M&M's candies. Then cover with foil wrap and freeze until you are ready to serve.
WHEN READY TO SERVE:
1. Remove cake from freezer and place it onto a sheet of wax paper (for easy clean up). Take a clean knife and run it under warm water for a few seconds. Then run the knife around the outer edge of the cake. When the knife begins to stick, pull it out and run it under warm water again and continue until you go entirely around the cake.
2. Open the clip and remove the rim. Transfer the ice cream cake onto a serving plate.
3. Use a clean knife to slice the cake. If too frozen, wait a few minutes for the ice cream to soften, about 5 to 8 minutes. Then slice and serve immediately.
Yields: 10 to 12 servings
Notes
Best to freeze your ice cream cake for at least 30 minutes before adding any sprinkles, or M&M minis on top. This will prevent the candies or sprinkles from "bleeding" their colors into the whipped topping before it freezes.
Allow it to freeze before covering it tightly with foil wrap. Freeze the final cake for a few hours before serving or overnight is best.
Nutrition Information:
Yield: 12 servings Serving Size: 1 servingAmount Per Serving: Calories: 326Total Fat: 17.8gCarbohydrates: 30.6gFiber: 1.4gSugar: 22.5gProtein: 4.3g
Hi friends! If you enjoy our post on how to make an Easy Ice Cream Cake? Let us know and leave us a comment below about your cake, and what flavors you made it with. Sharing your insights and experiences helps everyone who reads them, and helps us too! For more delicious dinner ideas and recipes…Follow us on INSTAGRAM, PINTEREST, and FACEBOOK!
Have a Great Day! 🙂
…Thanks for stopping by!
xo anna and liz
Related Posts:


Welcome! From Anna and Liz
We believe the kitchen is the center and the heart of the home. It is where we cook, eat, and unwind with family and friends, creating memorable traditions! Read more…
FREE EMAIL BONUS
Weeknight Dinners Made Easy
Tips & recipes for delicious meals . . . no matter your skill level!
FREE EMAIL BONUS
Weeknight Dinners Made Easy
Tips & recipes for delicious meals . . . no matter your skill level!
I made the ice cream cake today with coffee and vanilla ice cream, gluten free gingersnaps for the crust, and crushed heath bars and caramel and chocolate syrups, and whipped cream. My son requested a heath bar ice cream cake for his birthday, and I followed your directions as I had never made an ice cream cake before. The directions were clear and easy to adapt to my ingredients. I look forward to tasting it at the party tomorrow…I have a severe wheat allergy so cannot always eat the dessert at parties. Thanks for your help!
Hi Judith! Welcome to our blog, it is so nice to meet you! I am thrilled you made an ice cream cake for the first time and adapted to your son’s favorite flavors! I am sure he will be so surprised and have a beautiful smile that’s priceless when he sees it. Thanks so much for subscribing! If you can, share a photo on our Instagram -tag us @2sistersrecipes – we’d love to see it! And a Happy Birthday to your son today!
Our daughter always makes ice cream pie for family birthdays. The grandsons especially like picking the flavor of ice cream for their birthday pie. This sounds like double the fun and so pretty!
Thanks, Susan, I hope your daughter will try making this ice cream cake for your grandson’s birthday. Have a great day! 🙂