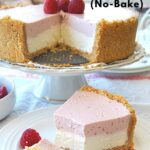
No-Bake Raspberry Lemon Cheesecake

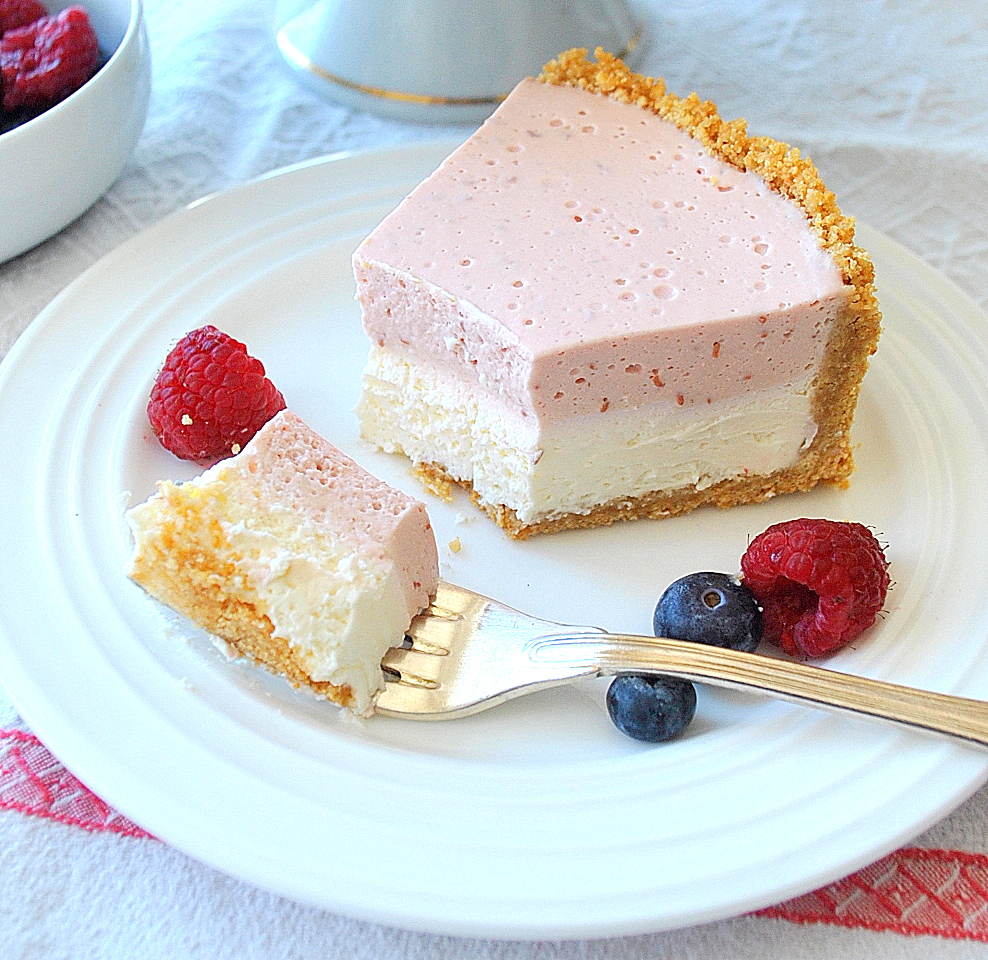
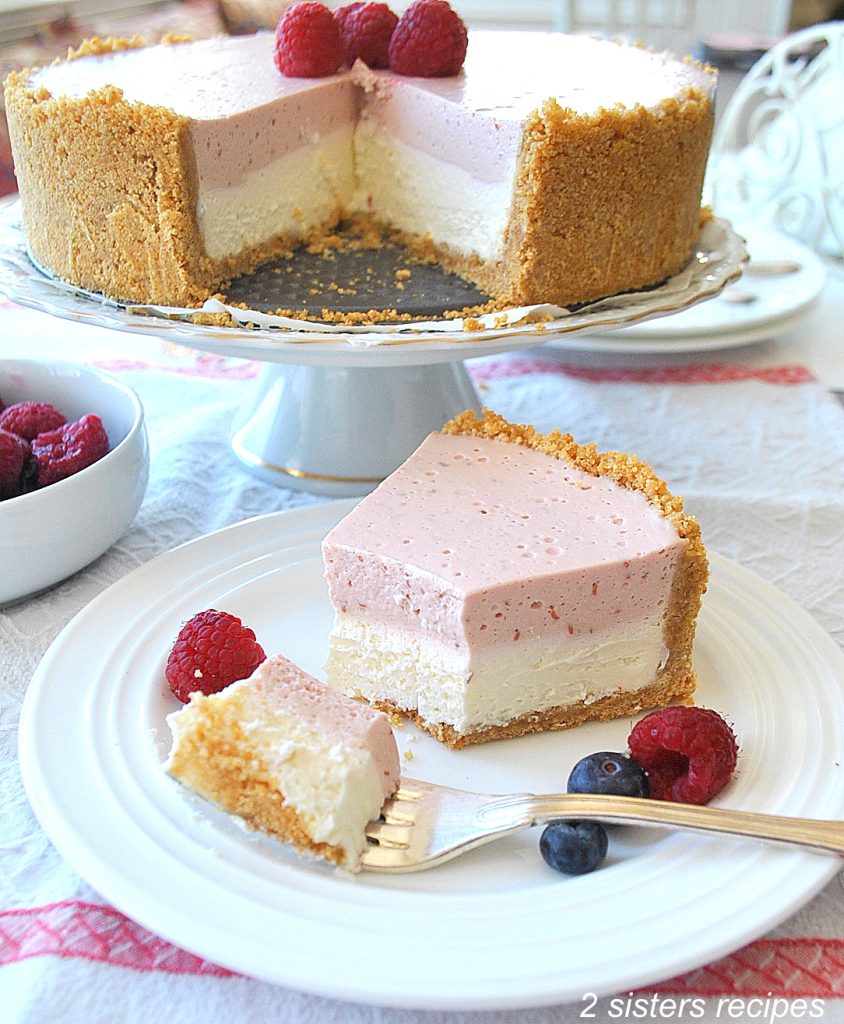
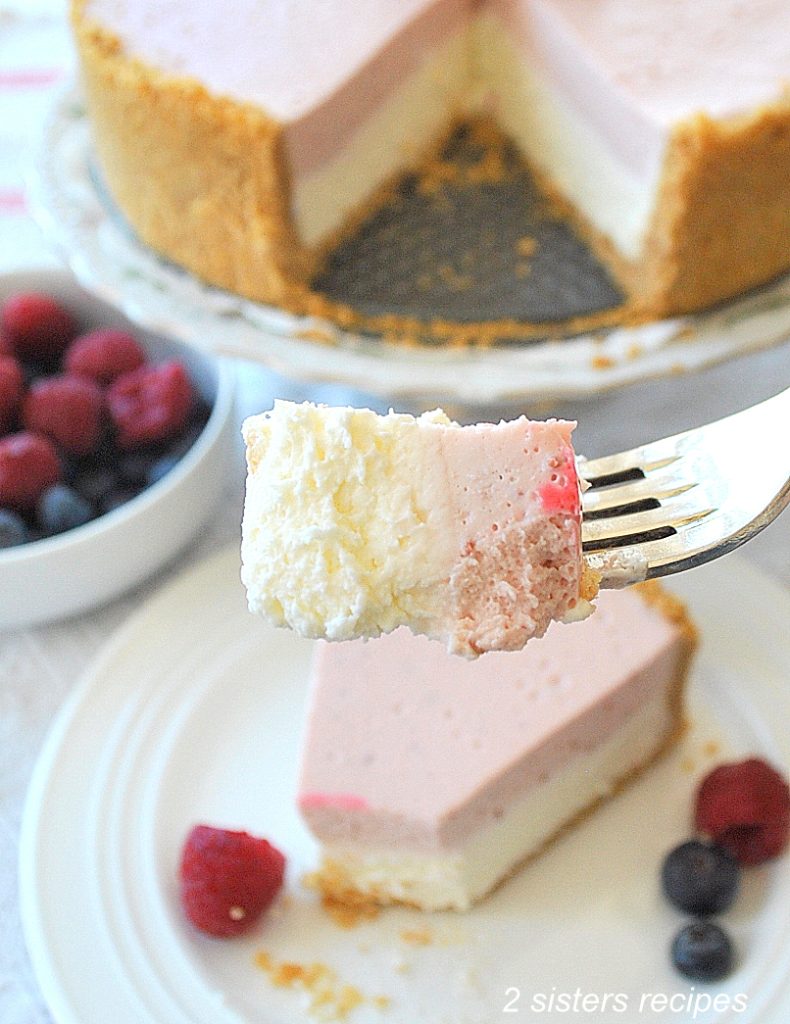
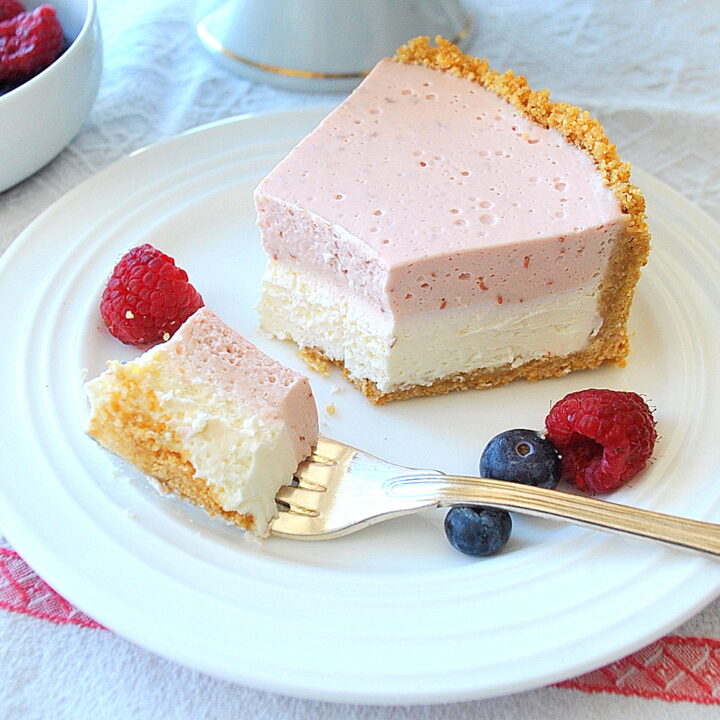
Are you ready for a fabulous dessert? Our No-Bake Raspberry Lemon Cheesecake is a double-layer cheesecake that is mouthwatering and delicious. It consists of a layer of lemon cheesecake at the bottom and a light raspberry mousse on top. This cheesecake will make a delightful and festive addition to your table. We’ll show you how easy it is to make this dessert with step by step photos.
No-Bake Raspberry Lemon Cheesecake…
Our raspberry lemon cheesecake is a very impressive dessert. It is not only smooth and creamy with a delightful combination of two flavors, but very also – this dessert is super easy to make!
And, this is by far one of our favorite cheesecakes! Family gatherings and special occasions are worth making desserts like this no-bake raspberry lemon cheesecake.
It is so simple and easy. All you need is make room in your freezer to help chill the crust and and each layer – which makes it even faster to put it all together.
Best of all – every time you serve this no-bake raspberry cheesecake – it leaves a big impression!
If you love cheesecakes, then be sure to try our Creamy Italian Cheesecake, and our No-Bake Blackberry Cheesecake. Both recipes are fabulous, too.
Reasons we LOVE this cheesecake!
- Two Mouthwatering Layers: we added a layer of raspberry filling along with a higher and thicker graham cracker crust, taking it to a new level!
- Easiest Cookie Crust: The buttery crust is easily made with a mixture of graham cracker crumbs, sugar, and butter and then transferred to the freezer. No reason to bake it. Just a quick freeze to get it to set.
- Easy Steps To Follow: We’ll show you step-by-step how to make this amazing cheesecake.
- Make Ahead and Freezer-Friendly: Best of all, you can make this cheesecake up to two days ahead of your occasion or freeze it for up to 2 weeks.
So let’s get started!
How to Make Our No-Bake Raspberry Lemon Cheesecake?
There are 3 Easy-To-Follow-Steps to make this dessert. Plus, our full recipe card is located at the bottom. But first, let’s run through our steps so you’ll understand what’s involved before you start.
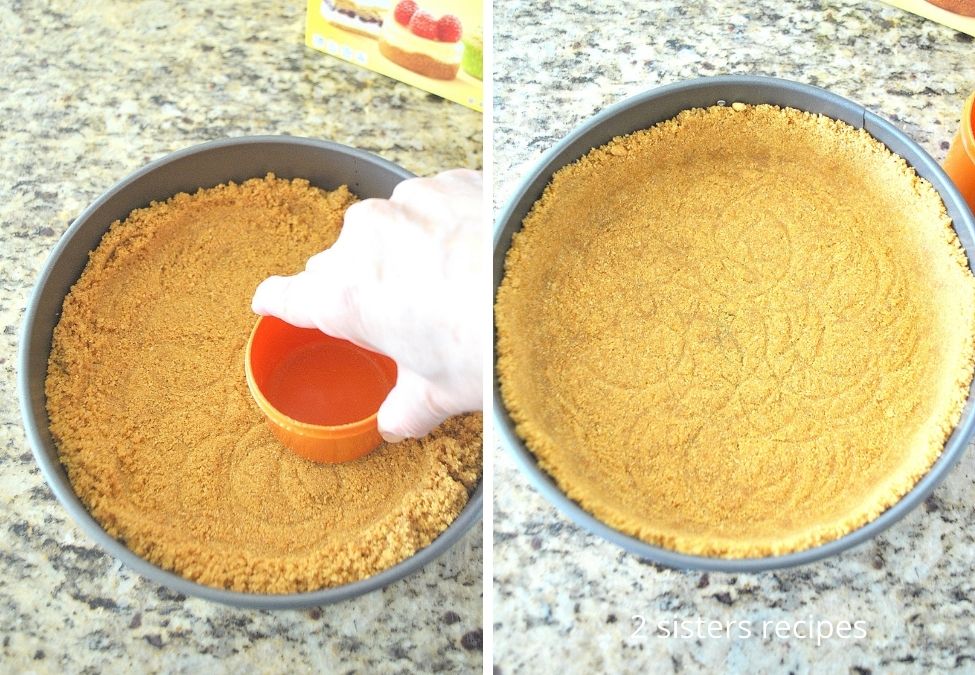
Step 1: Make the Crust
1. In a small bowl, stir together the graham crackers crumbs, some brown sugar, and melted butter.
2. Then press firmly on the bottom and up the sides of a 7-inch or 8-inch springform cheesecake pan.
3. Use a measuring cup to help press the crumbs firmly. Then transfer the crust into your refrigerator or freezer. Allow it to set, while you prepare the fillings.
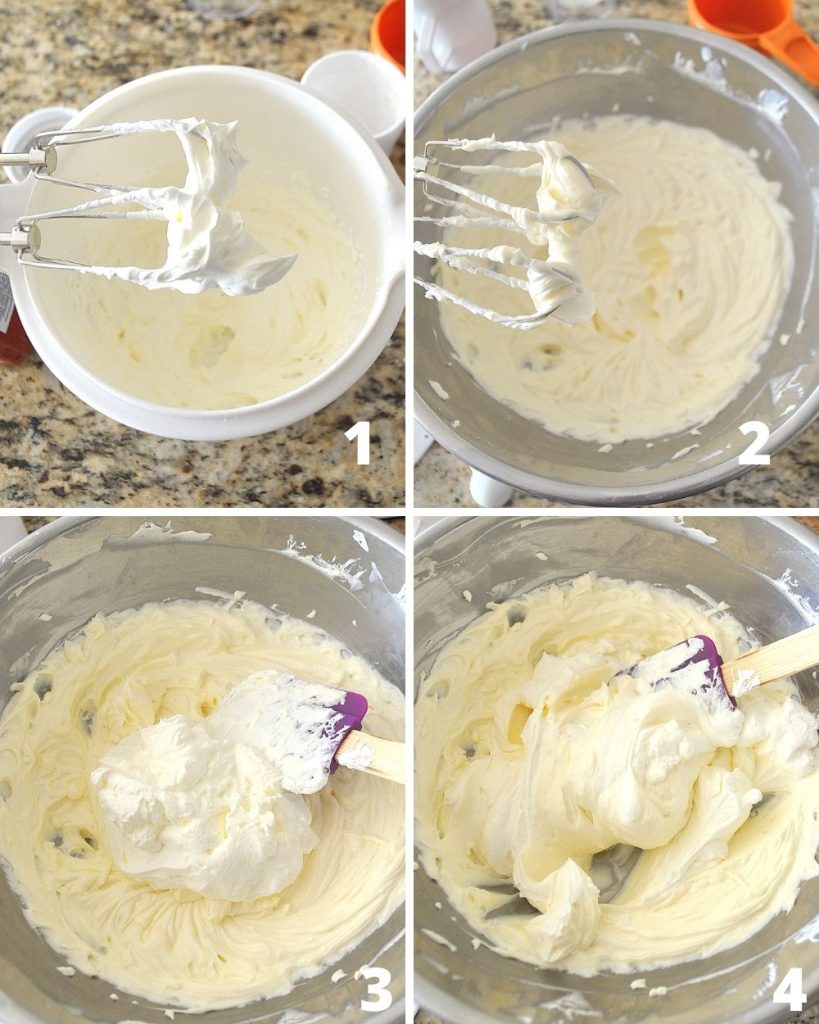
Step 2: Make the Lemon Cheesecake Filling
A. In a small bowl, blend on high speed the whipping cream for about 3 to 5 minutes, until the whipped cream forms stiff peaks. Set it aside. Do not clean the beaters.
B. Next, in a second medium-size bowl, blend the cream cheese with sugar, sour cream, vanilla, and lemon juice until well blended.
C. Transfer the whipped cream to the cream cheese mixture.
D. Use a spatula to fold in the whipped cream, and do this a few times, until the whipped cream is incorporated into the cheese mixture.
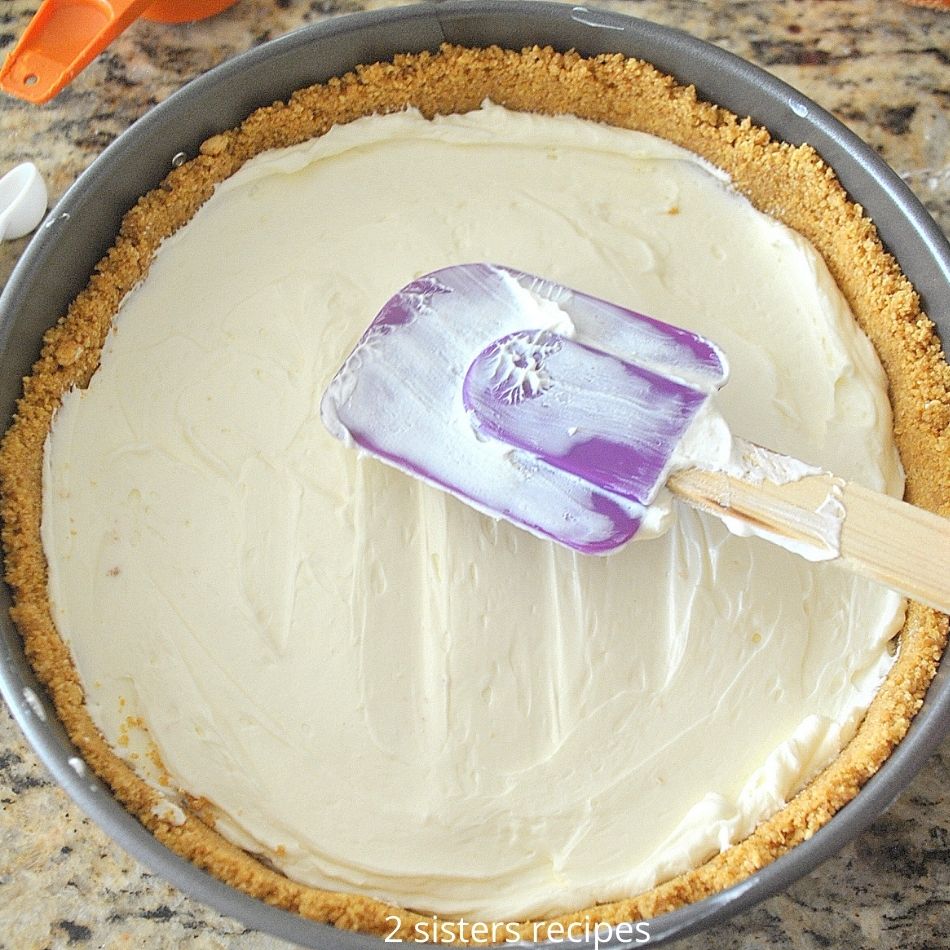
Next, remove your prepared cake pan from your freezer. Pour the cheesecake filling over the crust, in the springform pan:
Use the spatula to help smooth the filling into an even layer. Then transfer the pan back into the fridge or freezer.
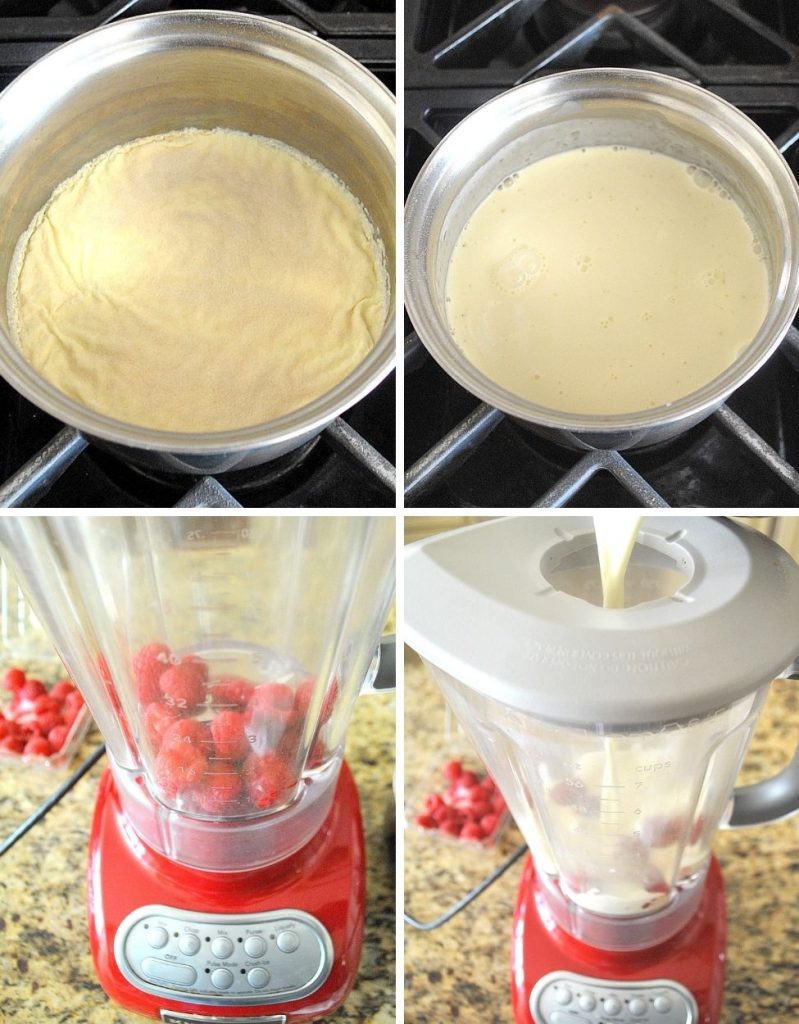
Step 3: Make the Raspberry Filling
1. In the meantime, pour heavy cream into a small saucepan and sprinkle with 1 envelope of unflavored gelatine over the cream. Let it sit for about 1 minute.
2. Turn on low heat and stir the cream. Add the sugar and vanilla and stir until the sugar and gelatine are completely dissolved. Turn off the heat.
3. Take out your blender and toss 2 cups of fresh raspberries.
4. Cover with the lid, and pop open its top. Slowly pour in only 1/2 of the hot cream mixture. Close the top, hold the top of the blender with your hand, turn on the “lowest” speed, and blend for a few minutes. Pop open the top of the cover and pour in the remaining hot cream. Close the lid, and continue to blend, gradually increasing the speed.
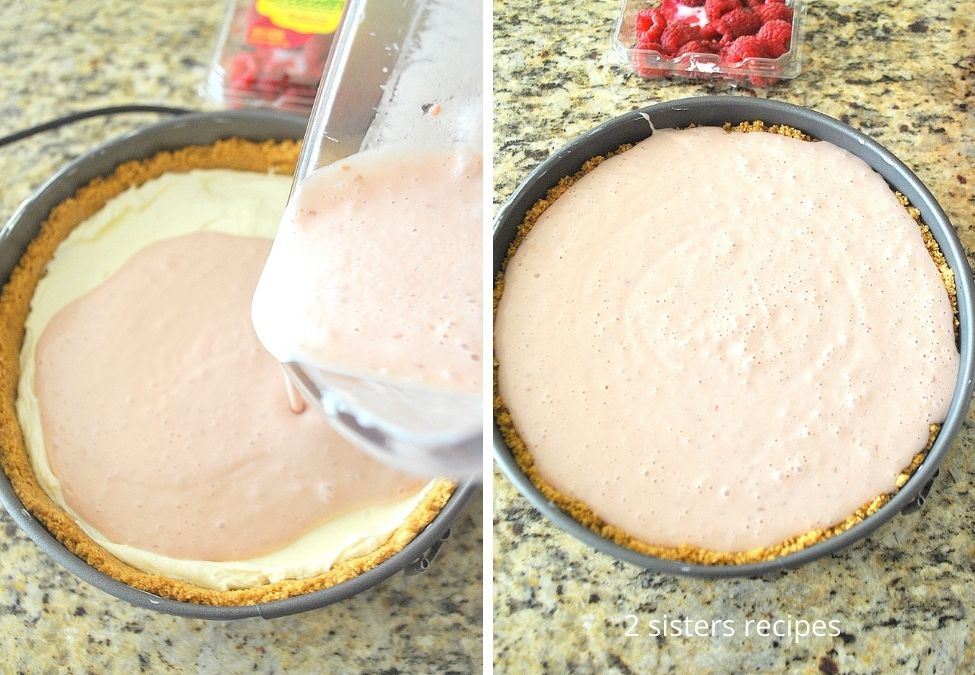
5. Remove the cheesecake (from your freezer) once more and pour the raspberry filling over the cheese filling.
6. Chill uncovered, for a few hours before covering it with a sheet of aluminum foil. Then continue to chill for a few hours before serving. It is best chilled over night.
When Ready To Serve…
- Run a clean knife around the edge of the springform pan to loosen the crust from the sides. Then pop open the clip and gently lift the rim of the cheesecake.
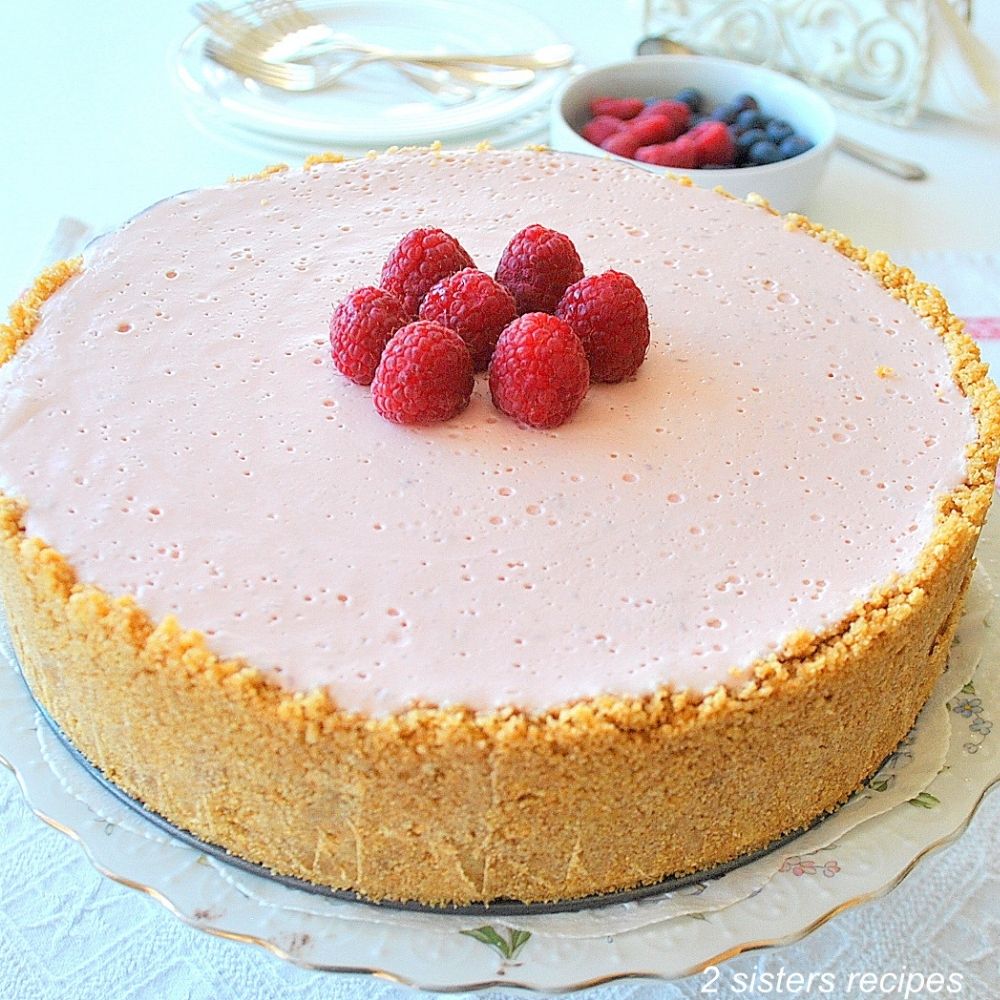
- Transfer to a serving plate. Don’t forget to garnish with fresh raspberries on top.
- Serve with some homemade whipped cream on the side, if desired (but not required!)
A Memorable Dessert
No-Bake Raspberry Lemon Cheesecake always turns out fabulous!
I bet it will be the dessert that will disappear as soon as you place it on the table. Try this recipe, and let me know! ENJOY!!
Try These Next!
- No-Bake Lemon Cheesecake Bars
- No-Bake Banana Pudding Ice Box Bars
- Best Tiramisu (No-Bake)
- Silky Chocolate Cream Pie (No-Bake & Dairy-Free)
- No-Bake Blackberry Cheesecake
Don’t forget! If you try our No-Bake Raspberry Lemon Cheesecake, let us know and leave us a comment below. Sharing your insights and experiences helps everyone who reads them, and helps us too!
More Delicious Desserts You’ll Love:
- Creamy Italian Cheesecake
- Mixed Berry Icebox Cake
- Pear Maple Pecan Cheesecake
- No-Bake Carrot Cake Bites
- Easy Ice Cream Cake
No-Bake Raspberry Lemon Cheesecake
No-Bake Raspberry Lemon Cheesecake is a light double-layer cheesecake that's mouthwatering and delicious. With a layer of lemon cheesecake and a raspberry mousse on top, this cheesecake will make a delightful and festive presentation on your table.
Ingredients
FOR THE CRUST:
- 2 cups ( 200g) graham cracker crumbs
- 6 Tbsp. ( 85grams) unsalted butter - melted
- 4 Tbsp. (50g) packed brown sugar
FOR CHEESECAKE FILLING:
- 1 cup (8-ounces) (240ml) of heavy cream or whipping cream
- 2 tsp. powdered sugar
- 2 bricks ( 8-ounces each) (452grams) of cream cheese - at room temperature
- 1/2 tsp. vanilla extract
- 3 Tbsp. lemon juice
- 1/4 cup (61.3g) of full-fat sour cream
- 1/2 cup (100g) of sugar
FOR TOP LAYER Raspberry Filling:
- 2 cups (473ml) of heavy cream
- 1 envelope of clear gelatine (U used Knox)
- 4 Tbsp. sugar
- 1 tsp. vanilla extract
- 2 cups (332g) (1 pint) of fresh raspberries
Instructions
1. MAKE THE CRUST: In a small bowl, stir together the 2 cups of crumbs, 4 tablespoons of brown sugar, and 6 tablespoons of melted butter. Press the crumbs firmly on the bottom and up the sides of a 7 or 8-inch springform cheesecake pan. Use a measuring cup to help press the crumbs firmly. Then transfer the pan to the refrigerator or in the freezer to chill the crust while you prepare the filling, at least 10 to 15 minutes.
2. MAKE THE WHIPPED CREAM: In a small mixing bowl, use a hand-held electric mixer to beat (on medium speed) 1 cup of heavy cream for 2 minutes, then add 2 teaspoons of powdered sugar. Continue to beat on the "highest" speed for about 4 to 5 minutes, until the cream is thick and forms stiff peaks. Set aside. No need to clean the beaters.
3. MAKE THE LEMON CREAM CHEESE FILLING: In a large mixing bowl, add the 16 ounces of cream cheese, 1/4 cup of sour cream, sugar, 1/2 teaspoon of vanilla extract, and 3 tablespoons of lemon juice. Beat until creamy and smooth.
NEXT: Fold in gently the whipped cream into the cream cheese mixture. Do this with a spatula, gently folding in the cream a few times until it is well incorporated.
THEN remove the crust from the freezer (or fridge). Slowly pour the cheesecake filling into the crust, and gently spread it evenly, with the back of the spatula. Transfer the cheesecake back into the fridge to chill.
4. MAKE THE RASPBERRY FILLING: In a small saucepot, pour 2 cups of heavy cream and sprinkle one envelope of gelatin over the heavy cream. Leave it alone for about 1 minute. Then turn on the heat, and heat the heavy cream. Add 4 tablespoons of sugar and 1 tsp. of vanilla extract. Stir until the mixture is completely heated thoroughly and slightly thickens about 4 to 5 minutes. Turn off the heat.
5. FINAL STEP: Take out your blender, and toss in 2 cups (1 pint) of fresh raspberries. Then slowly pour ONLY HALF of the hot cream mixture into the blender. Place the top on the blender. Hold the top down firmly, then turn on the "LOWEST" speed. Blend for about 2 minutes.
Next, open the spout at the top of the blender and slowly pour the remaining hot cream. Close the top and continue to blend at the lowest speed. Then gradually increase the speed to "puree." Continue to puree for about 3 minutes. Turn off the blender.
Remove the cheesecake from the fridge, and slowly pour the raspberry mixture over the cheesecake. Transfer back into the freezer or fridge and chill for a few hours. Chill in the refrigerator overnight is best.
6. TO SERVE: Use a knife to loosen the chilled cheesecake from the rim. Open the clip and then remove the rim. Transfer cheesecake onto a serving plate. Slice with a clean knife. Serve cheesecake with additional raspberries on top and maybe some fresh whipped cream. Store cheesecake in the refrigerator for up to 3 days.
Yields: 12 to 14 servings
Nutrition Information:
Yield: 12 to 14 servings Serving Size: 1 servingAmount Per Serving: Calories: 447Total Fat: 37.2gCarbohydrates: 25.6gFiber: 1.9gSugar: 14.5gProtein: 4.7g
Have a delicious day! 🙂
thanks for stopping by…
xo anna and liz
Related Posts:

")


Welcome! From Anna and Liz
We believe the kitchen is the center and the heart of the home. It is where we cook, eat, and unwind with family and friends, creating memorable traditions! Read more…
FREE EMAIL BONUS
Weeknight Dinners Made Easy
Tips & recipes for delicious meals . . . no matter your skill level!
FREE EMAIL BONUS
Weeknight Dinners Made Easy
Tips & recipes for delicious meals . . . no matter your skill level!
The no-bake raspberry cheesecake from 2 Sisters Recipes is a luscious and effortless dessert that showcases the vibrant flavors of raspberries in a creamy, velvety cheesecake filling atop a buttery graham cracker crust, making it a delightful treat that is as easy to make as it is delicious to savor.
Thank you so much, Madalaine! You are so sweet to leave us a lovely commment! And welcome to our recipe blog, it is so nice to meet you!
It’s beautiful and so delicious! Perfect for Easter!
Thank you so much, Susan! We agree, it makes a pretty presentation, but best of all, the flavors are amazing! Hope you’ll get to try our recipe. Have a wonderful Easter holiday!